"Watermelon" by Amy Roller
Supplies - Pattern paper: Creative Imaginations; Cardstock: Bazzill, Stampin UP!; Embossing folder: Provo Craft; Mini brads: Oriental Trading Co.; Stamps: Close To My Heart; Black pen: American Crafts
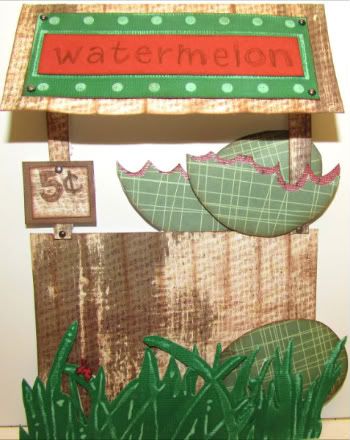
I decided to take the umbrella add-on and make it a watermelon. I made a cute little watermelon stand out of patterned paper.
• I accordion folded the "roof" the give it a 3D feel and overhang.
• I used an embossing folder and cardstock for the grass. I sanded it before I cut out around the embossed part and then added a stamped ladybug.
• I added mini brad for the nails and another embossing folder/stamps for the sign.
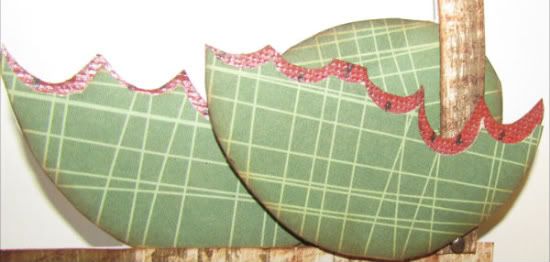
• For the watermelons themselves, I just hand cut the shape from patterned paper then used a circle punch and scissors to make the broken bite marks.

"Home" by Amy Roller
Supplies - Cardstock: Bazzill, Stampin Up!; Stamps: Stampin Up!; Ink/Markers: Stampin
Up! Versamark; Wood Embellishments: House of 3; Patterned paper: Echo Park; Metal Embellishments: Making Memories; Brads: Oriental Trading Co.; Ribbon: unknown
I used the add-on as a lamp shade this time. I just altered the size to fit and hand cut the shape. Then I punched stitching lines for detail on the shade but because it is such a small piece, the holes were likely to rip if I tried to stitch them so I just used a marker and "faux stitched." For the actual lamp I just cut a small strip, fold it vertically and then hand cut the details along the open side. Unfold and you have the finished base.
I wanted a view from inside so I added a flourish stamp to the "walls" that I embossed so they would show up better and look like wallpaper. I also added a window with curtains. You can see through the window to an outside view.
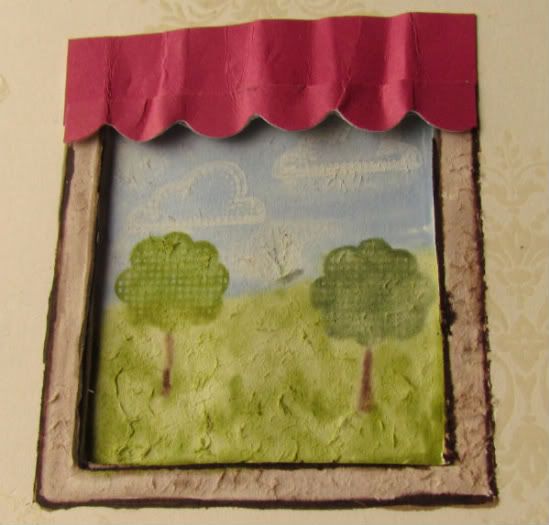
For this I water colored the sky/grass and stamped the trees and clouds.
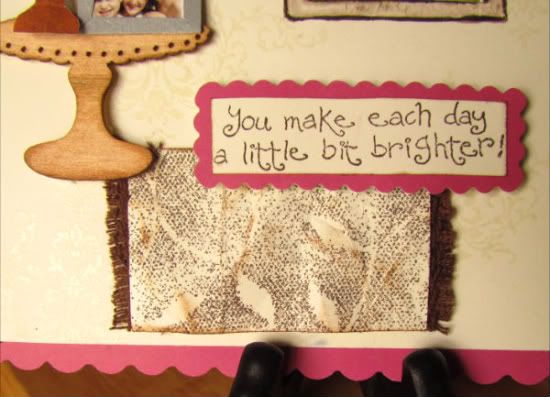
For the inside I added a small table that is a pre-made wood embellishment that I colored with Glimmer Mist. I then pop dotted the lamp base onto the table and added a light bulb that I hand cut from patterned paper. I also added a pull switch that I made out of wire.
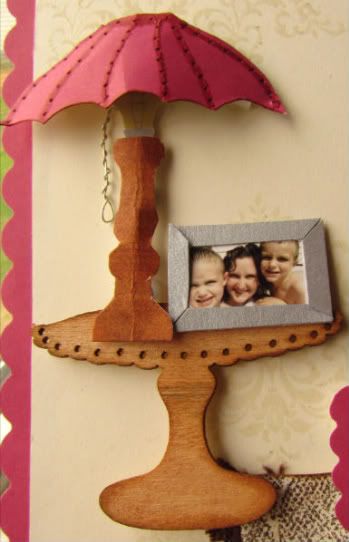
The walls and floor needed a little attention as well so I used small metal embellishments as wall art that I "hung" with wire and a brad for the nail. For the floor, I made a rug. I stamped a background stamp and then added twill ribbon to the end that I frayed out beforehand by pulling several strands off after trimming off the edge of it. The last thing was the sentiment, which I stamped and then added a scalloped border to match the scalloped base of the project.
No comments:
Post a Comment