Showing posts with label 2 page layout. Show all posts

Wednesday, November 23, 2011

LONG TIME COMING..or maybe going..

Ok I have to say that I have been missing in action lately.  My boys have both been ill and are having to have breathing treatments every 6 hours right now so I haven't tried to post this week..however, I HAVE tried numerous times before that these last few weeks and it would show my post in blogger and just keep saying it was saving..saving.. saving.. and NEVER post!! I have had things to update but got so furious I just gave up.  Then the boys got sick, so FINALLY this week it appears blogger likes me and it posted!!!   YAY!!

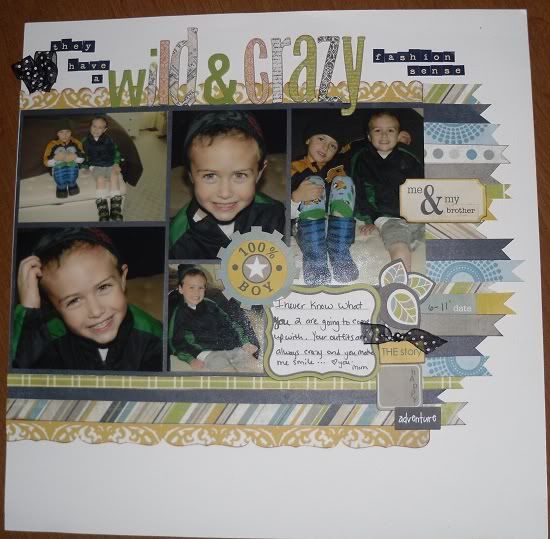
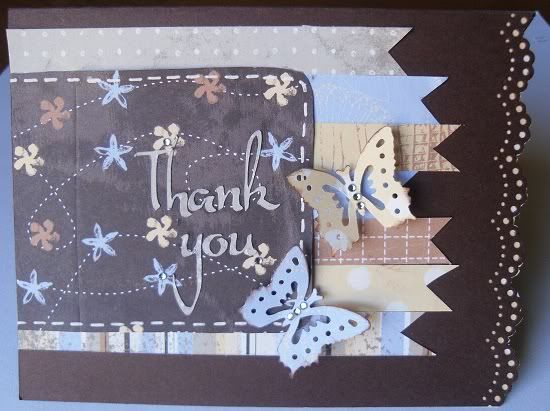
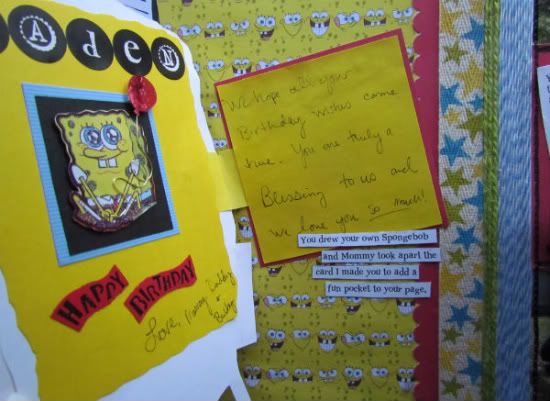
Because I am so far behind, I am going to post just pics of my recent Sketchsupport stuff and then I have an announcement.
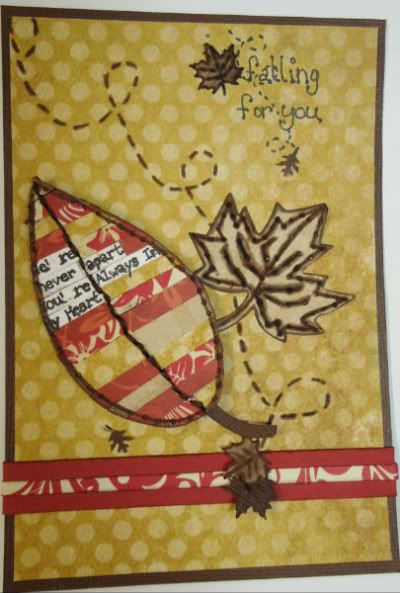
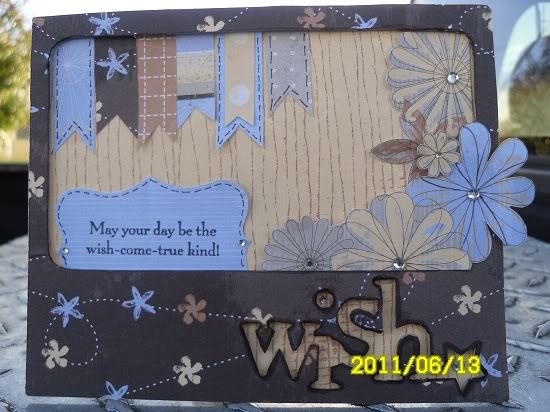
Please ignore date on this..it is way off and i didn't realize the date was on the picture b/c it doesn't show up on the camera! I would have taken another one but i had already given it away before I posted it.
All these are from sketches by Allison Davis and the original sketches can be found here: just click on card sketches.  NOTE** The last 3 are from the same sketch!!

As for the announcement, I want you to know that I have decided I will not be reapplying for the Sketch support Design Team again this coming year. As a matter of fact, the team call ends today..if any of you are planning on giving it a shot : )

I LOVE sketchsupport and have had a great time this year and Allison has been GREAT to work with.  I will certainly be following along this coming year.  I plan to keep doing sketches and posting my projects here as well.  I thank all of you for "following" me and hope to keep up my blog better this new year. (That's actually 1 of my new  years resolutions  LOL : )  I guess you could say "my cup runneth over" this year and not always in a good way. I have been so busy that I have not been able to spend time with my kids like they deserve and I want that to change. I am hoping that by changing some of things that I currently do that come with deadlines and extra responsibilities, we can spend more time together. And who knows, maybe even have a few more photo opportunities for those scrapbook pages. (*wink*wink*)  I can't wait to see the new sketches this year and see who makes the team.

Thanks again for being patient when there have been a lack of posts and know that I never forget you..sometimes blogger is stubborn and posts are late, and sometimes I'm just enjoying life and will tune in soon with a scrapbook page to share it with you.

Tuesday, September 27, 2011

2 page Birthday LO on Sketchsupport


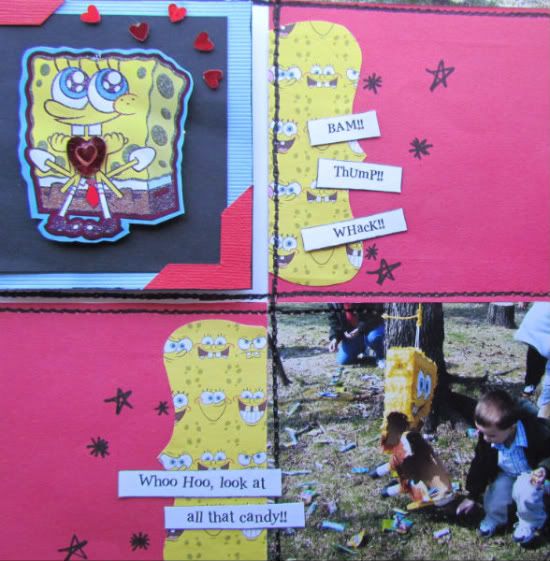
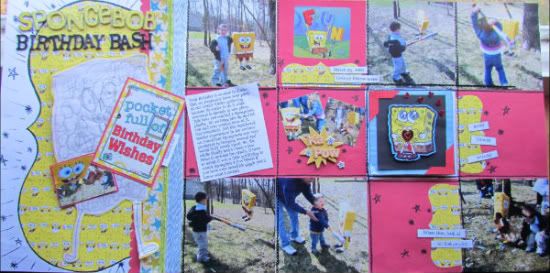
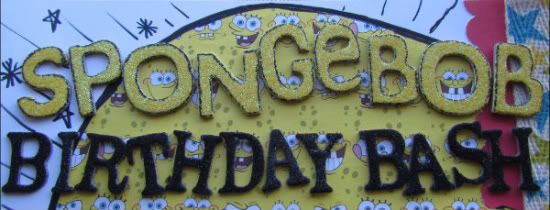
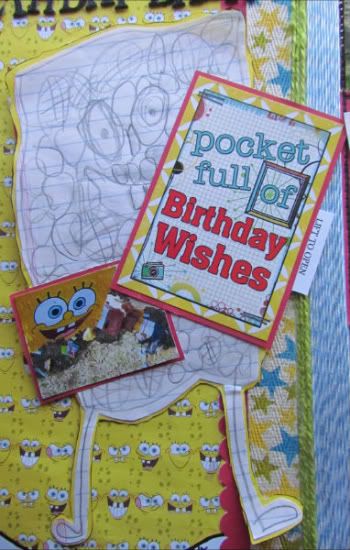
"Spongebob Birthday Bash" by Amy Roller
Supplies - Patterned Paper: Sandy Lion, Two busy Moms, unknown; Ribbon/Twill: unknown, Jillibean Soup; Cardstock: CTMH and Bazzill; Stickers: Unknown, BoBunny, K&Co; Other: Sharpie marker Sketch:Allison Davis
I followed the sketch fairly close on this one. I didn't have a die cut paper that matched my color palette or theme so i just traced around another one from my stash onto the back of the Spongebob paper I wanted to use and then hand cut it, making my own.

The flap and Spongebob drawing are the other variations I made to the page. I wanted to keep his drawing he did for his Birthday that year and incorporate it into the page so I used it in place of the 5 x 7 pic. This worked well because it's roughly the same size.

I added a sticker and another small photo here as well. I made this area a moveable element with a hinged area that you can lift for more journaling and memorabilia.


Next I put my squares in place along with the 4 x 4 photos. I did add an embellishment in place of one of the pictures on the right side.
It was from the Birthday card I made him that year. I also added another part of the card under the flap on the left side.

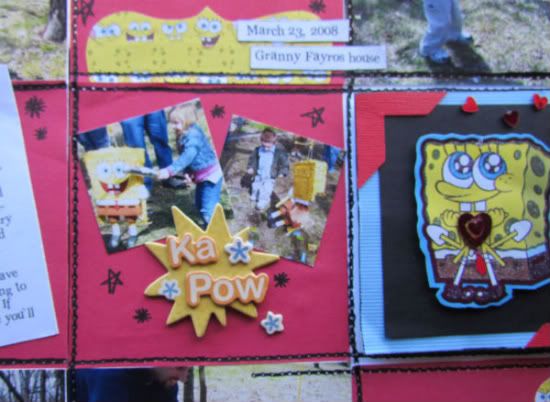
I kept with the 4 x 4 pics and squares for the others with exception of one. On the square next to the journaling box I added two small square pics and an embellishment on top of a 4 x 4 square.

This allowed me to add more pictures and follow the theme of the layout with the "KA POW" sticker without really messing up the overall 4 x 4 design.

Because my papers were so themed and specific, I didn't have a coordinating group to pull other patterns from. Instead I used twine and twill ribbons in place of the pattern paper strips and stripe. They also helped me pull in more colors that coordinated with the pictures rather than my main diecut papers.

The overall theme of the layout was lots of animation and movement. I wanted it to have a child-like cartoon feel to it and so there are little "doodles" and very graphic bold faux stitch lines. It's not meant to be exact, which is not my norm, but was definitely more fun and less stressful making! I didn't worry about it all being just right, I had more fun with it. I love it when my actual photos inspire me! I would have NEVER doodled and such on a layout before so this was a teeny step out of my usually very organized box!

Tuesday, September 13, 2011

2 sketchsupport layouts..

Here are 2 sketches and the layouts I made from sketchsupport! 
Following sketch by: Allison Davis
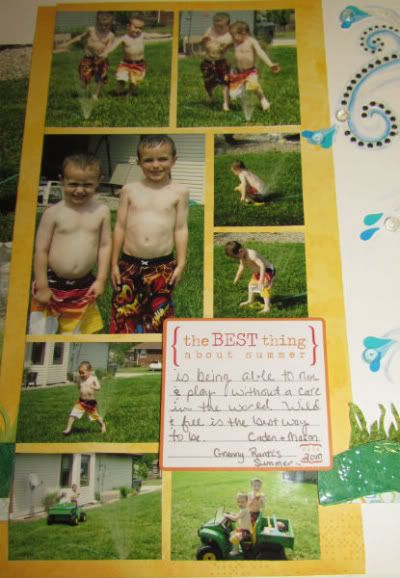
This 1st one I followed with a 2 page Layout and here's the details:
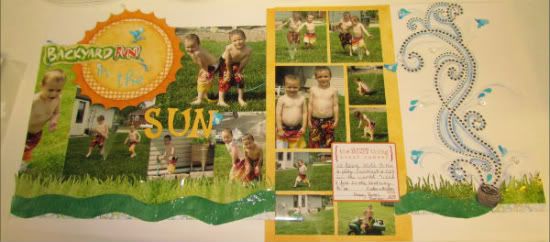
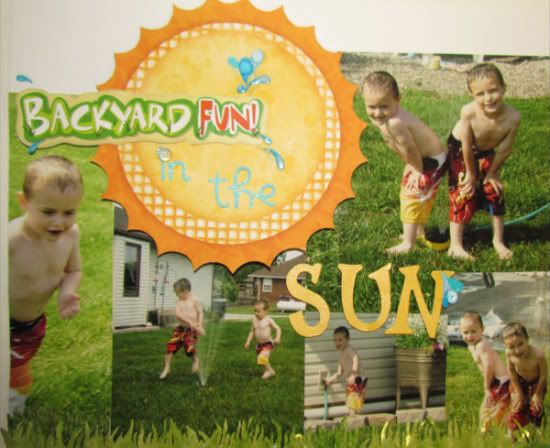
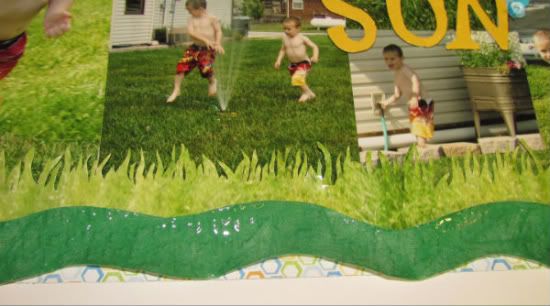
"Backyard Fun in the Sun" by Amy Roller
Supplies - Patterned paper: Bo Bunny, Two Busy Moms; Cardstock: Close to my Heart, Stampin Up!;
Stickers: Karen Foster designs, Creative Memories; water droplets: Hobby Lobby; Liquid glass: Close To My Heart; Cuttlebug, Emboss folder: Provo Craft; Markers: Zig, Stampin Up!; Blending pen: Stampin Up!; Journling Spot: My Little Yellow Bicycle

The main variations for my layout are that I changed the picture sizes and have a total of 13 photos on this page! I also changed the "waves" along the bottom and turned it into grass and a water hose instead. I left off the fish elements along the bottom because I didn't have anything that really fit my changed theme. Instead, I added more detail and texture to the hose.

I started the layout by arranging my pictures on the left side and it just worked out that I could fill the bottom area of the page that only has three small photos in the sketch.
I cut the large sun out of my pattern paper and used it to ground my title. I added in small water sprinkles with 3 -D "droplets" and crystal effects to create a "wet" look.

Next I decided to use leftover grass from my cropped photos and cut it to look more like actual grass blades and then placed it along the bottom. This is where the waves in the sketch are.
I then put down my pattern strip that is in place of the stripe in the sketch. I would have preferred the stripe but I didn't have one so I improvised with something close that pulled in all my colors.

For the right side, I had a ton of small photos so I made a collage with them in the place of the three large photos and decided to leave some background paper showing to help break up the photos because there was so much green throughout them.
Next I hand cut a hose and ran the pieces through an embossing folder with my cuttlebug for the texture of a real hose. Then I covered it with liquid glass which makes it shiny and more 3-D. For the end of the hose I hand drew and cut out a shape like the metal end of a hose and then added a silver gel pen over the whole piece.
Next, I added a large swirl rhinestone and more liquid glass coming off in "splashes". I added more water "droplets" throughout as well as water stickers. Last I traced the flow of water with 3 different colored markers and blended them out with a blender pen to give it a more lifelike see-through look of water.The second layout, I made a 1 page with the same sketch..sorry pics are a little yellow!

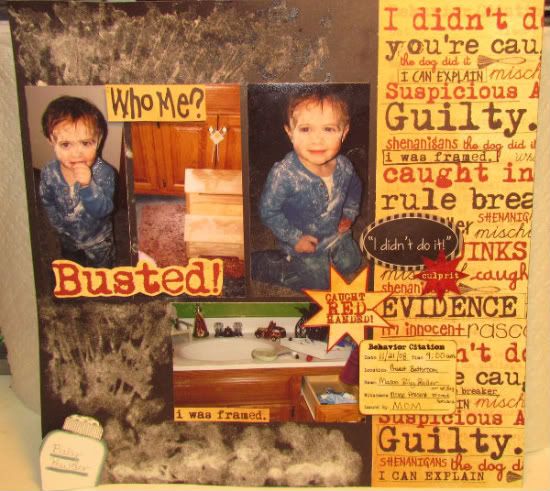
"Busted" by Amy Roller
Supplies - Patterned paper: Creative Imaginations; Cardstock: Close to my Heart; Stickers: Creative Imaginations, Bella Blvd; Flocking: Enchanted Creations

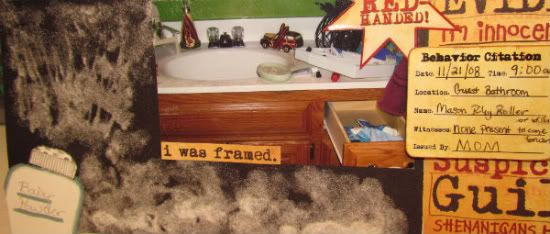
On this layout, I used the left side of the two-page sketch. I flipped the pictures to have the three on top and one on the bottom to leave room for the bottle of baby powder and mess. I sort of kept the swirl element from the right side of the sketch as well and incorporated it into the bottom left corner.
To make the spill of powder, I used my finger to dab glue all over and then applied flocking over the top. Then I added in little embellishments across the page. Some are stickers, some are hand cut from the pattern paper.
This was a real quick layout and I love these pictures even though I wasn't very fond of the mess!

Monday, September 12, 2011

Scrap-a-palooza Layout

This Saturday was yet another awesome Palooza!  We had a great time and I met some great new people to scrap with! (Shout out to Cindy!) Here are a few pics of the only page I can show you..the others are for Sketchsupport so you will have to keeping checking in there to see the rest (wink, wink!)


Sunday, August 28, 2011

This is an old layout (notice the bad perm, and lots of extra baby weight via the one hanging off my hip!) but it is a LO that we did from a class at Scrapbook Generation several years ago...no it didn't take me quite that long to finish..but close to it!  I LOVED this class when I saw it and had a ton of pumpkin patch pics to use.  However, Allison made hers look flawless..mine not so much.  I had a hard time getting my pics to fit and sewing through 3 layers, I ended up having a few tears.  All in all, I would like to try this again with a different word, loved the concept..but it does require patience.  Something God is still trying to teach me!  :0 )  But it is another greatly designed page from Allison!

Monday, July 18, 2011

Family means the most in this layout...and a winner!

Sorry this post is so late in the day.  I had a little one I had to take to the Dr. today and is was a full day and we got home late this evening!  This LO is one of my favorites and I love reliving these memories!  I made this one for my brother..and the journaling tells the story behind all the photos. You can read it if you scroll down to the close up pics.  There are 13 pictures on this one!


The Winner for the Sketch book Vol 8 is ....
cherrie said...
Loved your layout. I really could use the sketch book. My favarite part of scrapbookings is spending time with my memories and my friends and trying to be creative.

Friday, July 15, 2011

Layout and a giveaway!!!!!

Today I want to share a layout with you that I made for the 2 page sketch that you can find over at sketchsupport.  And as always, Allison and Scrapbook Generation have been very generous to allow us to giveaway a copy of Sketches for Scrapbooking Vol. 8!!!!!!!!!!!!! 
To be eligible for the giveaway, just leave a comment on this post and tell me what your favorite part of scrapbooking is~~~the winner will be picked randomly and be posted Monday, so be sure to check back to see if your the lucky duck! I will then get your mailing address via email and we will get it shipped to you!

Now on to the layout from sketchsupport this week...

"You Make My Heart Flutter" by Amy Roller
Supplies - Cardstock: Close to My Heart, Stampin Up!; Punch: Anna Griffin, Stampin Up!; Mask: Martha Stewart; Ink: Glimmer mist, Stampin UP! ink pad and marker and splatter tool, Tim Holtz Distress Ink-Dusty Concord; Lace: My Mind's Eye and unknown; Tulle: Hobby Lobby; Swirl rhinestones: Prima; Stamps: Close To My Heart; Chipboard Butterflies: K&Co; Sticker: Recollections; Title stickers: American Crafts, unknown minis; Patterned paper: My Mind's Eye

I started out knowing I wanted to use pictures of our younger selves and use butterflies. I had a mask in mind, (which is actually a cake stencil!) and so I started with it and Glimmer Mist. I then inked all my edges with distress ink and splattered each page with a Stampin UP! air tool and a marker.


For the large element on the right side I decided to use a butterfly to follow the theme of the page.
I looked at a butterfly embellishment I had and just sketched out by hand the shape I wanted. I then traced it onto my pattern paper and again onto a piece of cardstock. On the cardstock layer I then hand drew the details and used an exacto knife to cut out every other "vein" on the wings. I also added pop dots to this layer, allowing the pattern below to show through and give it some depth.
Afterwards I added in thickers and stickers.


Next I placed my lace that runs horizontally across the page. I made it slightly pleated and then added my punched butterflies to it, the rhinestones are already on the lace.

To finish it off I added in a few chipboard butterflies that actually have acetate layers over them, some rhinestones here and there and added a sentiment to the butterfly instead of journaling.

Thursday, July 14, 2011

Scrapapalooza pages

Finally, here is the page I made during Scrapapalooza.  This is the LO from the sketch contest they have. I won 1st place with it.  I had such cute happy campers!

**(I have a few more pics to show, but it doesn't seem to want to load them..go figure! So I will try again soon.)** Urghh, I finally have a minute to "blog" and now the "blog" doesn't want to cooperate   : )
 This pic shows that there is a hidden journaling area that pulls out from behind the bottom area of the layout on the right side.

Saturday, June 25, 2011

I'm still alive...I promise!!!

OMG I cannot believe it has been so long in between posts...so sorry and shame on me!  I really have been swamped with well, life!  I have been working, attending LOTS of ballgames, painting the basement, totally overhauling my scrap room and I have to admit-enjoying the summer with my boys!  I did just get home from the 8th Scrapapalooza @ Remingtons in Spfld MO! It was fun and relaxing as always.  I brought home 1st place in the sketch contest (pics to follow soon!) and my friend Cherrie won 1st in the General overall contest! Yay us!!! We also had another person at our table win 1st in the 1 pager contest.  SG had a ton of new goodies as usual and of course I bought way more than needed, but whose actually keeping track... right?  (I would die if I actually counted how many sheets of paper I own!!)  Anyhoo..I did have a couple of  LO's on Sketchsupport recently.  Here is my 2 pager...
"Flowers From Jesus" by Amy Roller
Supplies - Patterned paper: Scenic Route, My Mind's Eye, unknown; Flowers: BasicGrey, Sassafrass; Rub-ons: SEI; Butterfly punch: Martha Stewart; Rhinestones, Black pen, Butterfly: Recollections;
Stickers: Creating Keepsakes, Jolees; Stamps: Papertrey Ink; Ink: Stampin UP!; Letters: American crafts, Prima

I followed the general sketch but changed the picture sizes and placements to fit what I had. Because of this I also used different sizes of strips along with a photo across the bottom to fill in the space.

I used pre-made flowers but mixed them up and added other elements to them. I also added a rub-on stem.


Because I wanted to use a longer title, I moved my journaling further over onto the 2nd page.
The papers I used came with word strips but only 1 of each so I couldn't do a matching border across but I liked the sentiments on them. So, I just went with it and used them together anyway, even though they were different colors.
This is the 1 pager ...

Make sure to skip over and check out the sketch and see what all the other DTeam members did with it!

Monday, May 9, 2011

2 page week and a blog hop winner!!

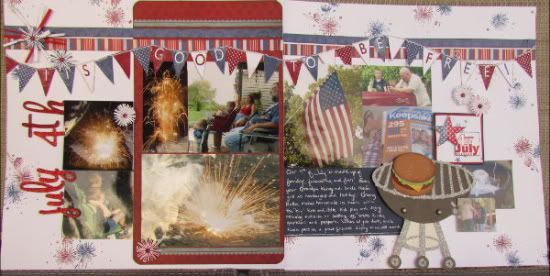
Ok this week is 2 pager week at Sketchsupport. This is the LO I made:

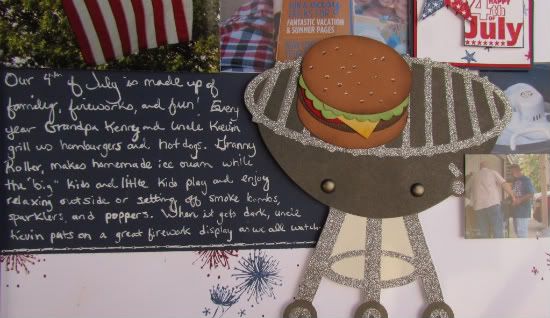
Supplies - Cardstock: Close To My Heart, Stampin UP!, Bazzill; Patterned paper: Scenic Route, We R Memory Keepers; Letters: American Crafts; Stamps: Close To My Heart, Stampin Up!, unknown; BBQ grill: Hobby Lobby; Brads: Making Memories, Stampin Up!; Thread

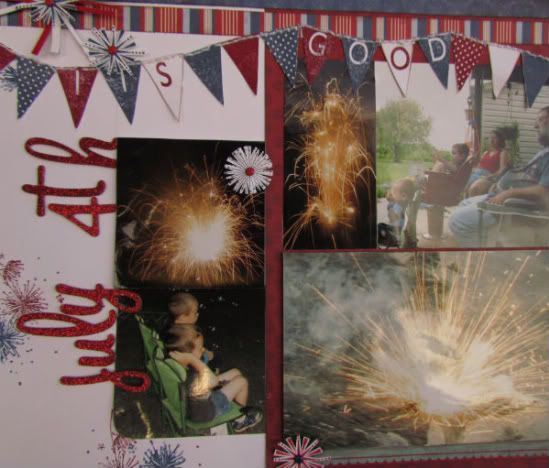
I stuck fairly close to the sketch as far as the papers go. I did change the picture sizes to fit what I had and wanted to make sure I didn't have to leave out any important ones. I added fireworks to the background paper using a stamp, (which is actually a flower stamp!) I had a few extra photos so I moved my title down the side instead of above the picture on the left.
I also popped several photos up along the layout to emphasize several of them.

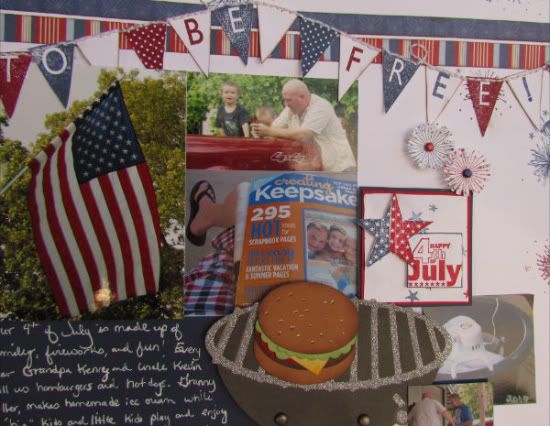
For the banner, I hand stamped it and cut it out. Then I stuck them down and stitched them together. I also added several hand stamped and hand-cut firework bursts across the page in place of the embellishments shown on the sketch.

On the right side, I added a BBQ grill embellishment that I bought at a craft store. I added a few brads to it for more detail. Then I topped it off with a handmade hamburger. The tutorial to make it is from my friend, Pam Todd of splitcoaststampers. It is made out of cardstock, and punches.
To see what the rest of the team does with it go on over to sketchsupport.

Last but not least, the winner of a Sketches For Scrapbooking Idea Book is:
 (I will contact you today to get your volume choice and shipping info!)  Congrats!!!!
          Karen said...
I love your page. You did a fantastic job on it. I scrapbook to preserve family memories. It's also a creative outlet for me. kah2000@msn.cm